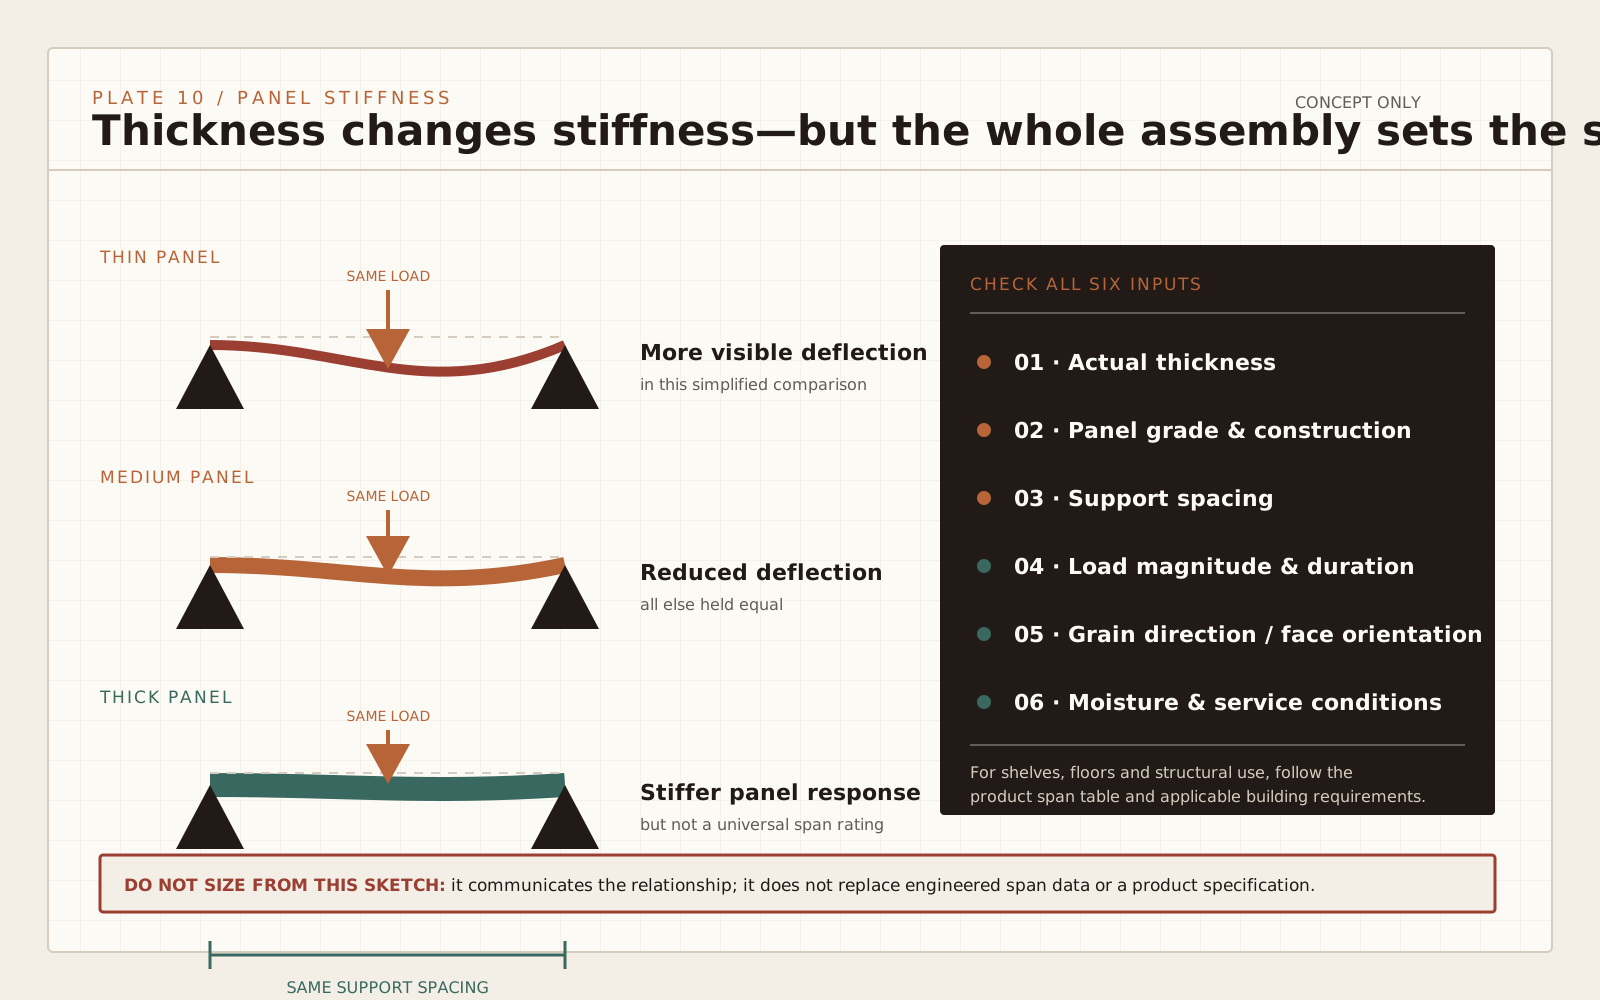
Start with the part, not a universal chart
There is no single correct plywood thickness for "furniture." A drawer bottom, cabinet side, long shelf, workbench top, and decorative back carry different loads and receive different support. Choose thickness by the finished part's span, edge support, load, joinery, hardware, exposed edge, and weight target.
Use common categories as a short list, then test the actual panel. A thin back captured in a groove can brace a cabinet without behaving like a shelf. A thicker shelf can still sag if the span is long and the edge is unsupported. A laminated top may be stiffer than one layer while also changing hardware and edge treatment.
Common thickness categories and shop roles
Thin project panels are useful for templates, drawer bottoms, dust panels, overlays, and cabinet backs when the part is fully supported or captured. Midrange panels can suit small cases, jigs, and light-duty components with sensible support. Thicker panels are common in cabinet boxes, shelving, desktops, work surfaces, and shop fixtures where edge fastening and stiffness matter.
The table below is a decision aid, not a structural span chart. It deliberately avoids promising a load capacity because species, core, grade, direction, humidity, support, and the actual product all change performance. For a load-bearing building component, use the rated panel stamp and the project's specified span and fastening schedule.
For furniture, make a quick mock-up when the choice is close. Support an offcut at the planned spacing, add a representative load gradually, and observe deflection over time. The goal is not a certified test; it is to catch an obviously flexible design before an entire sheet is cut.
Include edge treatment in that mock-up. A solid front lip, captured back, or divider can change the feel of a panel dramatically and may let a lighter construction meet the project's needs.
Why nominal and measured thickness differ
Plywood may be sold by a familiar fraction or a performance category while the mill stamp lists a slightly different measured thickness. APA guidance explains the use of performance categories for wood structural panels and shows mill thickness designations on the stamp. Decorative hardwood panels can follow other manufacturing tolerances.
This matters most at joints. A router bit labeled for a nominal fraction may cut a groove wider than the panel. A shelf pin, hinge screw, confirmat screw, or pocket-hole setting may assume more material than the panel provides. Measure with calipers and use an offcut to set the joint.
Do not assume two sheets from different product lines match. Even when the shelf cards show the same fraction, the face veneer, core, and measured thickness can differ. Buy enough matching material for a visible run and keep labeled offcuts as machine setup gauges.
Span and support control stiffness
Panel thickness is only one lever. Shorten a shelf span with a center divider. Add a solid-wood front edge or apron. Capture a back in grooves. Use a torsion-box or laminated construction for a broad work surface. Orient the face grain consistently with the principal span where the panel construction makes that relevant.
Support details can outperform simply jumping to a heavier sheet. A shelf fixed at the back and supported at both ends behaves differently from a loose shelf resting on four pins. A cabinet side tied to a face frame, back, and stretchers behaves differently from a freestanding panel. Draw the support path before choosing material.
Weight and handling matter too. A thicker panel increases mass, which affects wall mounting, hinges, slides, and whether one person can safely maneuver a full sheet. Break large sheets down on a supported surface and plan the sequence so finished faces are not dragged across the shop.
Match thickness to joinery and hardware
Dados need enough remaining material below the groove to avoid a fragile wall. Pocket holes require the jig and screw to match actual thickness. Screws driven into a plywood edge depend on core quality and pilot holes. Hinges, drawer slides, threaded inserts, and connector bolts each require minimum clearances stated by their manufacturers.
Thin panels are often best captured rather than edge-screwed. A drawer bottom in a groove distributes load along its perimeter. A cabinet back set in a rabbet or groove helps locate the case. Where a panel edge takes repeated impact, add solid edging rather than relying on a thin face veneer.
Plan exposed edges at the same time. Iron-on veneer adds almost no structural depth. Solid edging can add stiffness and impact resistance but changes final dimensions. A doubled edge or laminated panel affects the cut list and may require staggered seams.
A step-by-step panel selection method
List every panel part and mark whether it is structural furniture, decorative, captured, or unsupported. Record its clear span and support on each edge. Note visible faces, finish, hardware, joint type, and allowable weight. Then choose the thinnest sensible candidate and identify a backup if the available core is poor.
At the store, read the panel description and stamp, inspect flatness and core edges, and measure thickness. Confirm the sheet size and map major defects outside finished parts. If the panel must meet a rated construction requirement, stop using a furniture rule of thumb and follow the project documents.
In the shop, test an offcut in every dado and with every critical screw. Update the cut plan for the measured thickness, including edging and reveals. That workflow produces a lighter, cleaner project than choosing one thick panel for every part by habit.
| Nominal category | Common shop roles | Questions before choosing |
|---|---|---|
| 1/4 in. | Templates, captured backs, light drawer bottoms | Is every edge supported or captured? |
| 3/8 in. | Backs, jigs, small supported components | Will hardware or edge screws be used? |
| 1/2 in. | Small cases, drawer parts, moderate jigs | Is the span short and the core sound? |
| 5/8 in. | Casework where weight and stiffness must balance | Does the measured panel fit available joinery? |
| 3/4 in. | Cabinet boxes, shelves, tops, shop fixtures | Could support or edging solve the span more efficiently? |
| Laminated layers | Heavy tops, torsion structures, built-up edges | How will seams, weight, and final thickness be managed? |