Let the exact hardware define the box
A drawer opening does not directly equal drawer-box width. The runner system occupies space between the cabinet and the box, and that space is product-specific. Start with the exact manufacturer, model, nominal length, mounting orientation and construction method. Then read the current technical sheet before cutting a side.
Side-mount ball-bearing slides, concealed undermount runners, wooden runners and metal drawer systems do not share one deduction. Even products that look alike can specify different side space, rear preparation, setback, locking devices or bottom position. A familiar half-inch rule is therefore a model clue, not a universal standard.
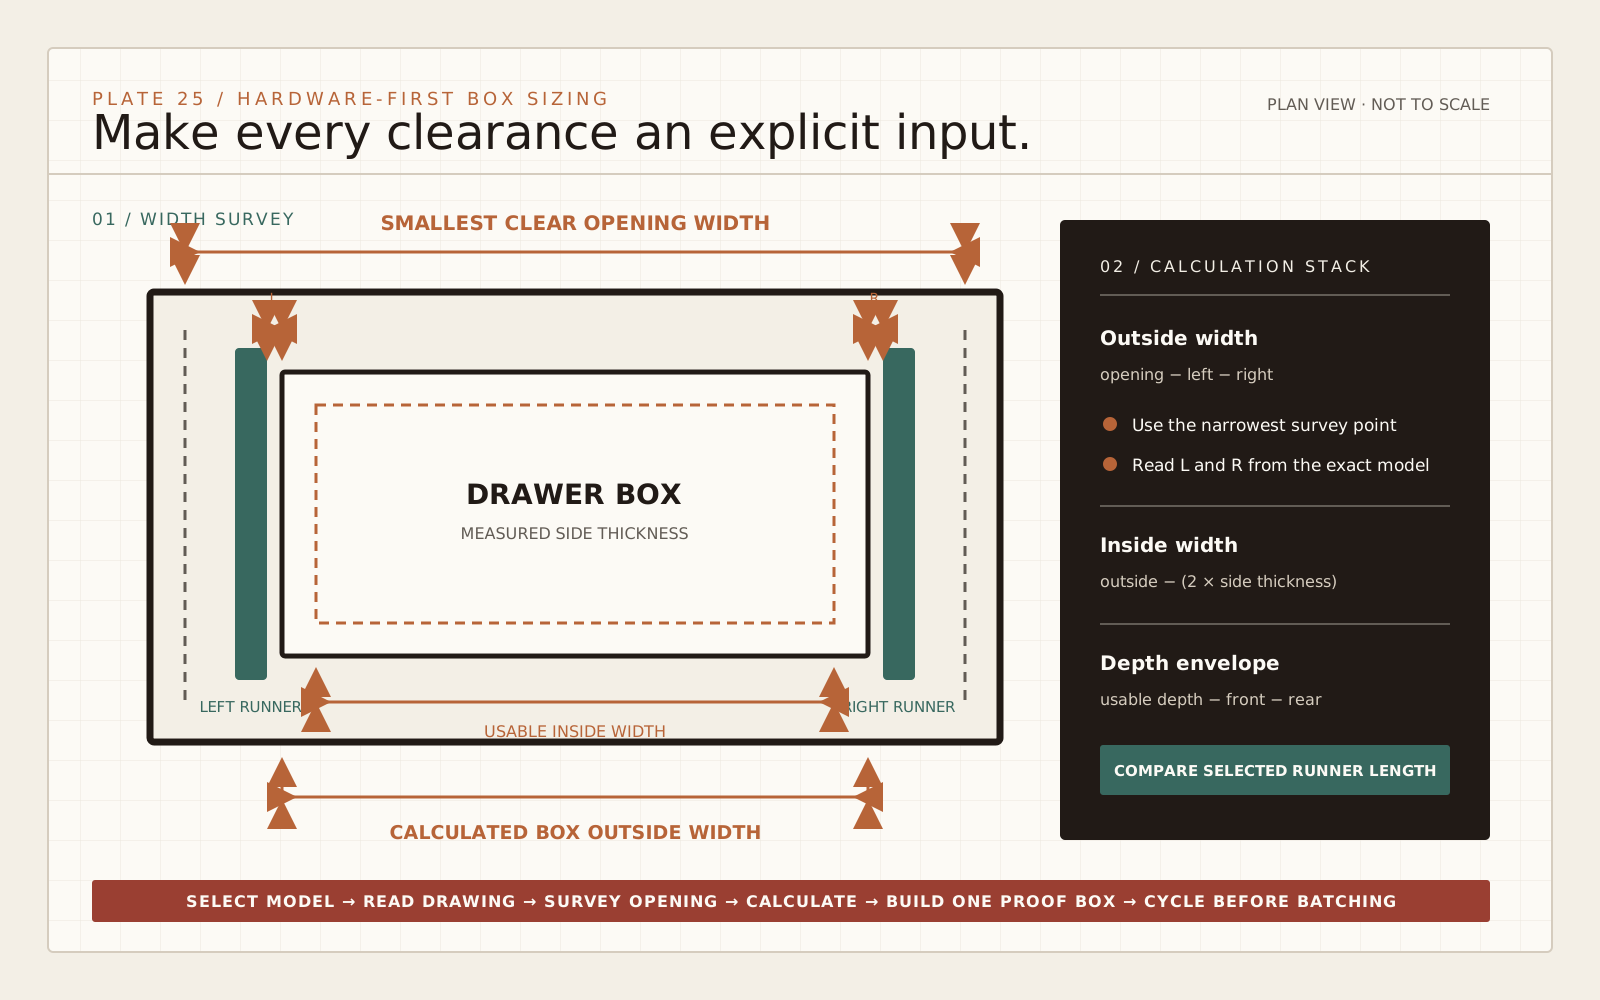
This calculator deliberately asks for left and right clearance separately. That makes a face-frame build, spacer block or asymmetric correction visible. It subtracts only the values entered; it does not infer a slide family from a brand name. The result is a planning envelope that must still agree with the product drawing.
Measure the opening as a small survey
Remove the old drawer and any loose hardware. Measure clear width at the front, middle and rear, at the height where the slides will run. Choose a fixed cabinet-front reference plane, then measure clear depth from that plane to the first real obstruction on both sides: back, hinge, pipe, face-frame lip or door hardware. Record separately how far the runner's front mounting datum must sit behind the same plane. Check the opening diagonals and place a reliable straightedge against both mounting surfaces.
Use the smallest verified width as the governing opening unless the cabinet will be corrected first. A narrow rear measurement cannot be averaged away; the drawer still has to pass through it. If the sides bow or the face frame is narrower than the case, decide whether properly fixed, parallel spacers will establish new mounting planes.
Record every measurement beside its location. Mark the front datum used by the runner instructions. An inset drawer front can change setback; a face-frame bracket can change the rear mounting method. Keeping those facts on one sketch prevents a correct subtraction from being applied to the wrong reference plane.
| Check | Use in the plan | If it fails |
|---|---|---|
| Front, middle and rear width | Use the smallest clear width | Correct the case or plan documented spacers |
| Clear depth from one cabinet-front plane | Use the shorter obstruction-free depth | Select a shorter runner or alter the cabinet |
| Parallel mounting planes | Required for consistent side space | Shim or rebuild before sizing the box |
| Diagonal comparison | Reveals an out-of-square opening | Do not expect slide adjustment to fix the case |
| Runner datum setback from that plane | Locates both cabinet members | Follow the overlay or inset detail for the model |
Translate the product drawing into inputs
Find the required installation width or side space for the exact runner. Some drawings state a clearance per side; others state the total box deduction. Convert a total deduction into left and right values only when the drawing shows a centered installation. This calculator is inch-only: retain the original metric values on the drawing, convert them to inches before entry, and do not round the conversion until layout.
Accuride's 3832EC instructions provide a useful product-specific example: the slide will not function properly with less than 0.50 inch of side space, while the recommended drawer box is 1-1/16 inch smaller than the cabinet opening. That recommendation belongs to that slide and construction detail. Entering 17/32 inch on each side reproduces the 1-1/16-inch total deduction; it is not a default for another product.
Blum's TANDEM documentation follows a different hardware system. It directs the builder to measure the cabinet opening, select the runner for drawer side thickness, load class and cabinet depth, then prepare the box to the specification for the chosen runner, including locking devices and rear-hook preparation. That sequence is the right general habit: select, read, calculate, then cut.
Calculate outside width before inside capacity
The width calculation is direct: drawer outside width equals measured clear opening width minus left installation clearance minus right installation clearance. For an 18-inch opening with 17/32 inch entered on each side, the result is 16-15/16 inches.
Usable inside width depends on the actual side thickness after milling, not the nominal material label. Subtract two side thicknesses from the calculated outside width. A 16-15/16-inch box with two measured 1/2-inch sides has 15-15/16 inches of clear inside width before any grooves, applied runners or interior fittings reduce it.
That inside number is a capacity check, not permission to redesign the hardware. A wide drawer can rack or exceed the runner's width, load or aspect-ratio limits even when the side spaces are perfect. Read the product's maximum drawer width, load-rating conditions and mounting orientation. Include the finished contents, box, front and dividers when evaluating load.
Cut a pair of gauge blocks to the calculated total side gap and test them against the opening and proposed box mock-up. A physical gauge makes cumulative error visible before joinery multiplies it across four parts.
Treat depth as an obstruction-free envelope
Usable cabinet depth is not automatically the distance to the back panel. Measure from one fixed cabinet-front reference plane to the nearest obstruction on each side. The calculator subtracts the runner's entered setback from that same plane and the required rear clearance to show a maximum box-depth envelope. Do not pre-subtract either value from the depth input. It also compares the selected nominal slide length with that envelope.
A runner whose actual length fits the envelope may still require a different drawer length, rear notch, hook bore, bracket or mounting-hole position. Nominal size and physical runner length can differ, so enter the actual runner length shown on the current drawing rather than its catalog label. Concealed undermount runners commonly coordinate drawer length with nominal runner length and specific back preparation. Side-mount slides can have inset-front setbacks or rear brackets. Take the actual box length from the technical drawing, using this result only as a fit gate.
Do not make the drawer deeper merely because space remains. Allow the specified rear relationship, confirm that the box clears the closed door and hinges, and check that disconnect levers or locking devices remain reachable. If the calculator reports a negative margin, choose shorter hardware or revise the cabinet; do not force the slide into a bowed or compressed installation.
Build and cycle one proof box
- Write the runner model and revision date on the cut sheet.
- Mill side material and measure its finished thickness at several points.
- Cut one box to the calculated outside width and the manufacturer's specified length and preparation.
- Mount both cabinet members from the same datum with the listed holes, brackets and fasteners.
- Check parallel, level and setback before inserting the box.
- Engage the disconnects or locking devices exactly as directed, then cycle the empty drawer several times.
- Check reveal, travel, soft-close or touch-latch engagement and removal before adding the front.
- Load-test only within the published rating and the installation conditions used for that rating.
Do not batch-cut several drawers until the proof box works through full travel without binding. Once accepted, keep a labeled setup block for the side deduction and a story stick for front datum, member position and box length. Those references transfer the verified system more reliably than repeatedly reading a tape.
Diagnose binding before changing the box
A tight drawer does not prove the box is too wide. First check cabinet-member parallelism, screw heads, bent members, debris, mounting-hole choice, inset setback and whether both sides are at the same height. Measure the completed box at front and rear and compare diagonals. A parallelogram can present the expected width and still bind.
If the side gap is genuinely below specification, rebuild or correct the part according to the hardware instructions; do not grind a runner or omit required fasteners. If the gap is excessive, determine whether the product provides an approved adjustment method. Improvised packing can move the runners out of parallel or reduce fastener support.
When a soft-close mechanism does not engage, verify the prescribed setbacks and reset sequence before altering the drawer. Accuride's 3832EC installation guidance, for example, calls attention to member setback and cycling the drawer after insertion. The most useful troubleshooting measurement is therefore not just box width; it is box width plus mounting geometry and mechanism state.