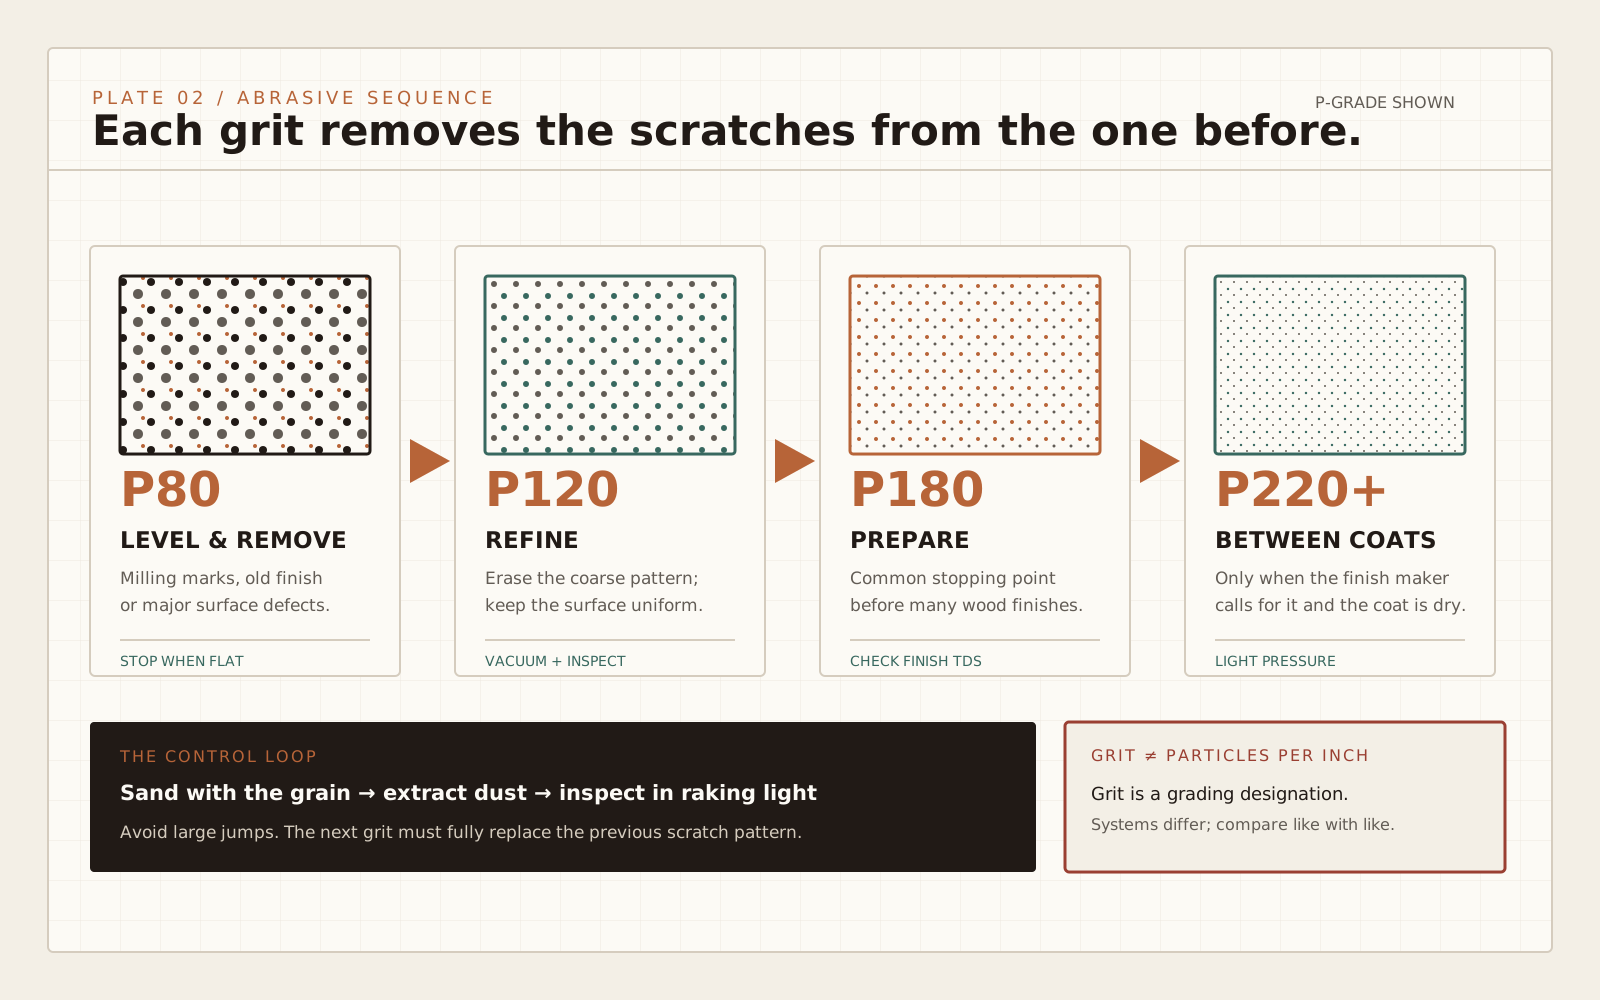
How Sandpaper Grit Works
Each grit cuts tiny scratches into the wood surface. Coarse grits cut deep, fast scratches; fine grits replace them with shallower, less visible ones. The progression from coarse to fine is the process of systematically replacing coarser scratches with finer ones until the surface is smooth enough for finishing.
Two things make the progression work:
- Don't skip grits. Going from 80 straight to 220 leaves the 80-grit scratches too deep for 220 to sand out efficiently. You end up wasting time and paper.
- Sand out the previous grit's scratches before moving on. Flatten the surface with each grit before stepping up.
Full Grit Reference Chart
The table below lists what each common grit does and where it fits in a typical progression.
Typical Sanding Progressions for Common Tasks
New hardwood furniture (starting from rough lumber, surfaced at the mill): start at 80 or 100, then 120, 150, 180, 220. Stop at 220 before applying most finishes.
Sanding between finish coats: 220 to 320 between coats of oil-based finish. 320 to 400 between waterbased coats, since waterbase raises grain more, so finer inter-coat sanding helps.
Paint prep on bare wood: 120 or 150 is often sufficient, since paint obscures scratches that clear finishes reveal.
Removing old finish: start at 60 or 80 to cut through the old coating, then step up through 120, 150, 180, 220 once the wood is bare.
Final polish on a cured finish: 400, 600, 800, 1000 (wet sanding) if you're chasing a flat, high-gloss result. Use a lubricant (mineral spirits or water with a drop of soap) for wet sanding grits above 400.
Shaping and material removal: start at 40 or 60 for aggressive shaping on a belt sander or for rapid stock removal. Move to 80 or higher once the shape is established.
When to Change Grits
The rule: a grit is done when its own scratches are the only scratches you can see. Look at the surface under raking light (a light source at a low angle, like a shop light held to the side). If you see deeper, irregular scratches from the previous grit, keep sanding with the current one.
When the surface looks uniformly scratched at one depth, with all the marks from the previous grit erased, move to the next grit.
Practical check: mark a small section of the surface with a pencil. Sand until the marks disappear uniformly. If they disappear quickly, you're ready to move up.
Sandpaper Types: Paper, Cloth, Film, and Sponge
Paper-backed — the standard. Garnet (orange-tan, older) and aluminum oxide (brown, most common today) are both used on wood. Aluminum oxide lasts longer.
Silicon carbide — gray or black paper, often waterproof. Best for between-coat sanding (wet or dry), sanding finishes, and working with very hard materials. Cuts more aggressively than aluminum oxide at the same grit.
Cloth-backed — more durable and flexible; used on belt sanders and for curved surfaces where paper would tear. Same abrasive minerals, tougher substrate.
Film-backed — consistent grit distribution, very long-lasting. Common in random-orbital sander discs. Pricier than paper but worth it for production use.
Sponge and foam — for sanding into coves, profiles, and curves where flat paper won't conform. Available in coarse and fine grades.
Orbital Sander vs Hand Sanding: Grit Differences
Random-orbital sanders leave tiny swirl marks from the orbital motion. These marks are invisible at the grit you're sanding with, but can show up under finish if you stop too early. Follow orbital sanding with a final hand-sanding pass in the direction of the grain at the same grit before applying finish. This removes the swirl pattern.
For hand sanding, always sand with the grain — scratches parallel to the grain are nearly invisible; cross-grain scratches show clearly under finish.
On a flat surface, hand sanding pressure needs a sanding block (a flat rubber or cork block with sandpaper wrapped around it). Bare-finger sanding follows the contour of your fingertips, not the flat wood, creating high and low spots.
Finishing Grits and What Comes After
The grit you stop at affects finish absorption:
120 to 150 is good for paint, since open grain absorbs well.
180 to 220 is standard for most clear finishes (polyurethane, lacquer, varnish, oils). Surface is smooth but still has micro-texture that helps finish bond.
280 to 320 is for waterbased finishes that raise grain more. Also appropriate when you want a smoother oil penetration.
400 and above is used between coats, or on the final cured coat before buffing, not typically for bare wood before the first coat.
Stopping too fine (above 320 on bare wood) can burnish the surface, closing pores and making some finishes, particularly penetrating oils, bond poorly. Test on scrap when using unusual finishing sequences.
| Grit | Category | What it does | Typical use |
|---|---|---|---|
| 40 | Extra coarse | Very aggressive material removal; leaves deep scratches | Rapid stock removal, belt sanding rough timber, removing thick old finishes |
| 60 | Coarse | Fast material removal, shaping | Rough shaping, removing old paint, belt sanding after 40 |
| 80 | Coarse | General stock removal | Starting grit for most raw hardwood; belt sanding; removing mill marks |
| 100 | Medium-coarse | Moderate removal, begins smoothing | Good starting grit for pre-surfaced lumber or after 80 |
| 120 | Medium | Smooths out coarse scratches | Standard second grit in most progressions; paint prep final grit |
| 150 | Medium-fine | Refines surface, removes 120 scratches | Third grit in standard progressions; good final grit before oil-based finish on some projects |
| 180 | Fine | Removes 150 scratches, prepares for finish | Near-final sanding on most furniture pieces |
| 220 | Fine | Finish preparation, smooths final surface | Standard stopping point before most clear finishes; between-coat sanding for heavier coats |
| 320 | Very fine | Between-coat sanding, fine surface prep | Sanding between finish coats; waterbase inter-coat standard |
| 400 | Extra fine | Finish polishing, wet sanding | Final inter-coat or wet sanding cured finish; removing dust nibs |
| 600-1000 | Ultra fine | Wet sanding cured finish for gloss | High-gloss wet sanding with lubricant; automotive-style finishing on wood |