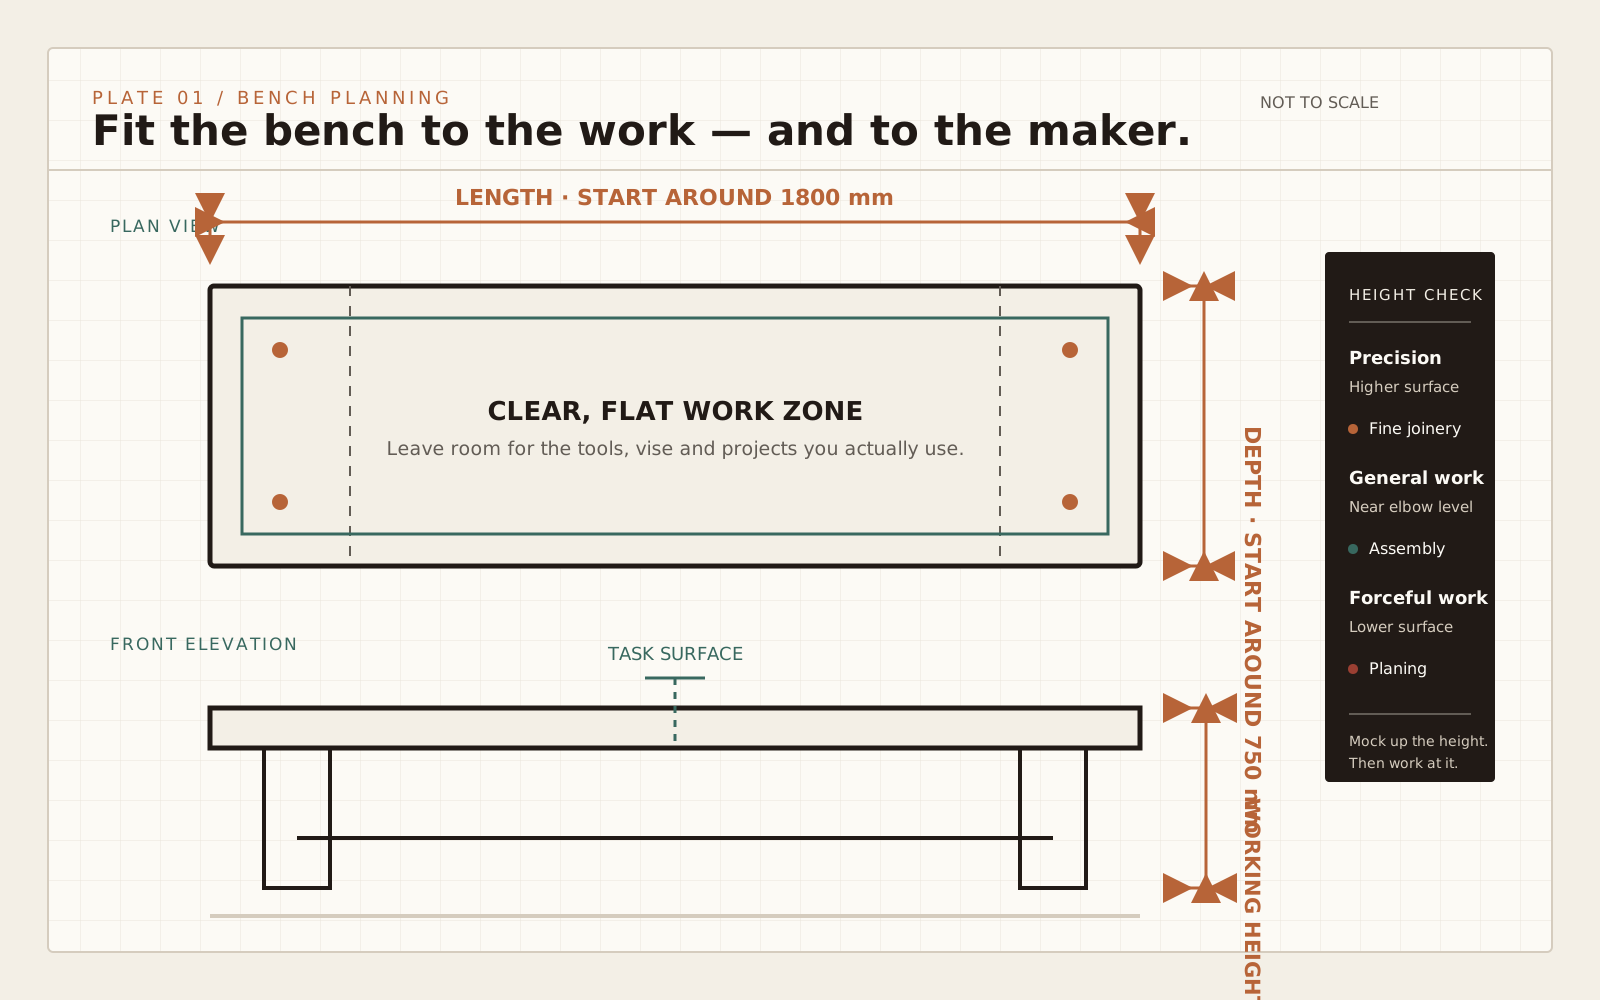
Why Workbench Size Matters More Than Most Builders Expect
A workbench that is too short forces you to work in cramped positions and provides no support when machining long boards. A bench that is too narrow limits clamping options and makes face work on wide panels awkward. A bench set at the wrong height is the most common cause of back fatigue in the shop — too low means hunching over hand tools; too high means pushing down instead of through the work.
The good news: workbench dimensions are forgiving within a range. The table below shows common sizes and the shop contexts they suit. Most builders land somewhere in the middle and find it works well for decades.
Workbench Height: The Most Personal Dimension
Bench height is a task-and-posture decision, not a fixed body formula. Precision work is often easier with the work closer to elbow height; moderate work usually suits a surface somewhat below the elbow; forceful planing or assembly may benefit from a lower surface that lets the body contribute without lifting the shoulders.
Include the height of vises, bench appliances and the work itself. A tall carving vise can raise the task well above the benchtop; a thick assembly can do the same. Favor a neutral back, relaxed shoulders, elbows close to the body and a reach that does not pull you across the bench.
Mock up at least two candidate heights with a temporary surface. Plane, pare, sand, assemble and inspect for twenty minutes each. Adjust until the primary tasks feel controlled, then measure. If several people or very different tasks share the bench, adjustable platforms, a lower planing beam or a height-adjustable bench can be more honest than one universal compromise.
Workbench Length: How Long Is Long Enough?
Bench length governs how long a board you can support on the bench surface while working on it. The practical minimums:
5 feet (60 inches): tight, works for small box-making and cabinet work; most boards end up hanging off the bench or need a support stand.
6 feet (72 inches): the most common minimum for general furniture work; comfortably supports boards up to 6 to 7 feet.
7 to 8 feet (84 to 96 inches): the sweet spot for most woodworkers — covers the vast majority of furniture-scale work with both ends on the bench surface.
Over 8 feet: useful in professional shops or for instrument making; diminishing returns for most home shops.
If your shop is tight on length, a 6-foot bench with a well-positioned end vise and a sturdy work support (roller stand or sawbench) handles almost everything a longer bench does.
Workbench Width: What You Actually Need
Bench width is less discussed than length but matters significantly for clamping and assembly work.
The minimum useful width is about 18 inches — enough for a drawer frame or small assembly but limiting for anything larger. Most builders land at 22 to 24 inches as a general-purpose width. This supports a wide panel flat on the bench, allows clamps on both edges simultaneously, and leaves room for tools staged at the back.
Widths over 28 inches become hard to reach across for handwork — you end up having to lean across the bench to plane the far side of a panel rather than working from the near edge. If you're building wide, consider whether the extra depth serves your work or just becomes a staging shelf.
For assembly benches specifically: wider is better. A secondary assembly table or an outfeed table at bench height can be 30 to 36 inches wide because you're working around it, not across it.
Workbench Size by Shop Type
The table below matches recommended dimensions to common shop types and work styles.
Garage and Small-Shop Adjustments
Most home woodworkers work in a one-car or two-car garage, a basement, or a dedicated room, often sharing space with storage, cars, or utilities. The pressure to minimize bench footprint is real. A few adjustments that preserve function:
Wall-mounted fold-down bench: for very tight shops, a bench hinged to the wall that folds flat when not in use. Practical for occasional woodworking; a serious limitation for daily use because it forces you to put everything away constantly.
Roubo-style through-slab bench (narrow): the traditional French bench design puts the vise on the front face and uses a thick, narrow top (22 inches) with a leg vise. This maximizes rigidity and clamping options without adding width beyond what's useful for handwork.
Peninsula orientation: instead of a bench against the wall, a peninsula jutting perpendicular into the room allows three-sided access. This makes assembly work and clamping from multiple angles much easier even on a shorter bench.
Adjustable-height bench: hydraulic or crank-adjustable workbenches exist but are expensive. A simpler solution: build in leveling feet (bolt-on furniture levelers) and shim or adjust once to your height rather than building a fixed-height bench you may regret.
Dimension Trade-Offs: What to Prioritize When Space Is Tight
If you cannot build to ideal dimensions, here is the order of priorities:
-
Get height right first. A short bench at the correct height is far more pleasant to use than a long bench that hurts your back. Height is non-negotiable.
-
Sacrifice length before width. Going from 7 feet to 6 feet hurts less than going from 22 inches to 16 inches. Width is what determines how you clamp and support work during handwork.
-
Compensate length with accessories. A roller stand or a simple sawbench at the correct height extends effective bench length without consuming more floor space.
-
Mass and rigidity matter as much as size. A small, heavy, rigid bench outperforms a large, flimsy one. Racking kills handwork precision and hand-planing becomes a test of steadiness, not skill. Aim for a minimum 4-inch-thick top in hardwood or laminated construction, and bolt-together bases with substantial mortise-and-tenon joints.
Once height, width, and mass are optimized, add length as space and budget allow.
| Shop type | Recommended length | Recommended width | Height range | Notes |
|---|---|---|---|---|
| Apartment / very small room | 5-6 ft | 18-20 in | Wrist height | Fold-down or rolling bench; maximize rigidity over size |
| Garage / shared space | 6-7 ft | 20-24 in | Wrist height | Standard for most home woodworkers; works for furniture and cabinets |
| Dedicated home shop | 7-8 ft | 22-24 in | Wrist height plus or minus 2 in per work style | Sweet spot for general furniture work |
| Serious hobbyist / semi-pro | 8 ft | 24 in | Calibrated per builder | Second bench or assembly table recommended at this level |
| Hand-tool focused | 6-8 ft | 22-24 in | 1-2 in below wrist | Lower for leverage; prioritize mass and rigidity over size |
| Power-tool focused / router table adjacent | 7-8 ft | 24 in | At wrist or slightly above | Consider integrating router table in bench end |
| Assembly bench (secondary) | 4-8 ft | 28-36 in | Same as primary bench | Wide top for panel glue-ups; can double as outfeed for table saw |