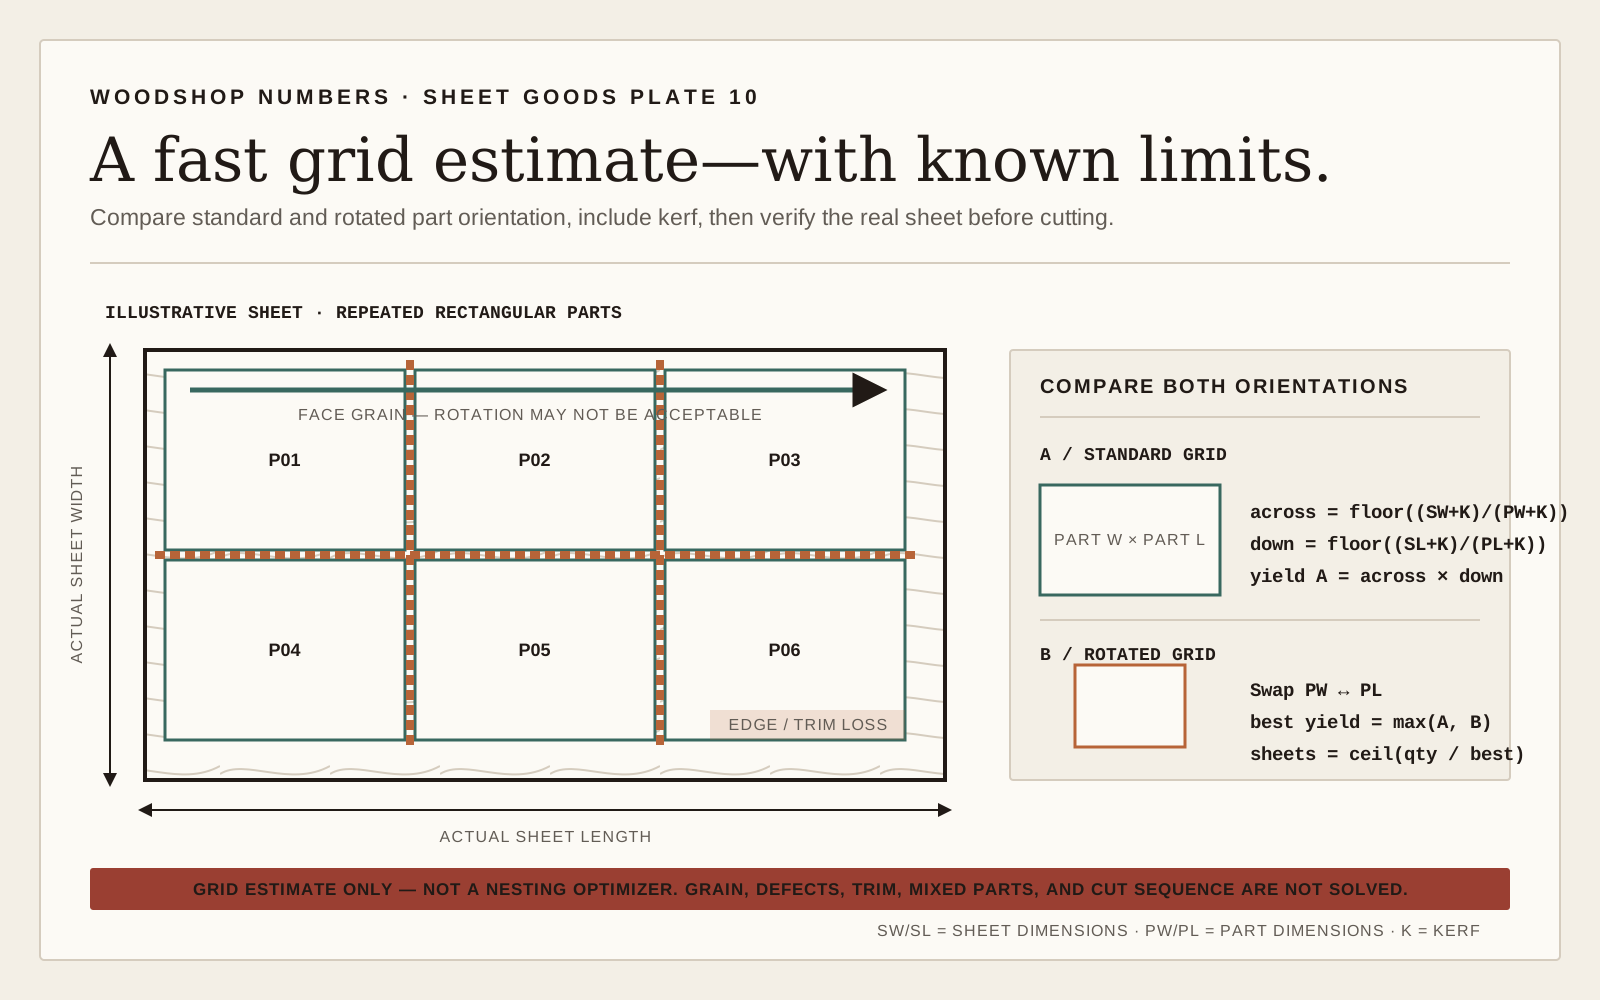
Why Plywood Cut Planning Saves Money
Plywood is sold in full 4×8 sheets (and sometimes 4×10 for cabinetwork). You cannot buy a partial sheet at most retailers. Every piece you waste is a piece you still paid for. For a typical kitchen cabinet project using a dozen sheets, the difference between planned and unplanned cutting can be two or three wasted sheets — a significant material cost.
Cut planning also reveals problems before they happen: a cut list that doesn't fit on the number of sheets you budgeted, grain direction conflicts that require more material, or pieces that simply can't come from a single sheet because they're too large.
How Plywood Sheets Are Measured
Four-by-eight feet is a common nominal panel format, but actual length, width and thickness vary by product, region, overlay and supplier. Do not assume a universal 47.75 × 95.75-inch sheet. Measure the panel lot—or use the exact manufacturer data—before entering the calculator.
Actual thickness can differ from the familiar fraction, which matters to grooves, hardware and flush assemblies. Face-grain direction and usable edges also vary by panel. Enter the measured working rectangle after any required trim cuts and treat grain direction as a separate layout constraint.
The Kerf: The Number Everyone Forgets
Every cut removes material. The blade's kerf — the width of material consumed by the blade — is typically around 1/8 inch for a standard 10-inch table saw or circular saw blade. On a single cut this seems negligible, but across a sheet with many cuts it adds up.
For planning purposes, add 1/8 inch of kerf loss for every cut that crosses the sheet. If you're ripping a 4-foot sheet into four pieces, you lose roughly 3/8 inch total — meaning your four pieces are slightly narrower than four times the nominal target width.
For rough cut lists, kerf usually falls within the tolerances you've already built in. For precision work — especially when your pieces must fit exactly within a sheet — account for kerf in each cut calculation.
Step-by-Step: Building a Cut List
Step 1: List every piece you need. Go through your project plans and write down each component: width, length, thickness, quantity, and whether grain direction matters.
Step 2: Group by thickness. A 3/4-inch panel and a 1/2-inch back panel cannot come from the same sheet. Group your cut list by the plywood thickness required.
Step 3: Sort by size, largest first. Large pieces are the hardest to fit and the most wasteful to cut incorrectly. Place them on your layout sheets first.
Step 4: Sketch a sheet layout (or use a cut optimizer). On paper or a grid, draw a 48 by 96-inch rectangle and begin placing your largest pieces. Work from one corner, fitting pieces side by side and end to end.
Step 5: Track remaining usable offcuts. Plywood cutoffs are valuable if large enough. A 12 by 48-inch strip left over from one sheet can provide several small parts for the same project or future use. Note usable offcuts as you plan each sheet.
Step 6: Count full sheets needed. Total up the number of 4×8 layouts required and add one for waste margin (see below).
Laying Out Cuts on a Sheet: The Rules
Grain direction first. If you care about grain, establish the orientation constraint before fitting pieces. This rules out rotating pieces 90 degrees to make them fit, which sometimes forces you to use an extra sheet.
Nest pieces efficiently. Place rectangles to minimize the leftover strip widths. A 30-inch-wide piece and an 18-inch-wide piece together equal 48 inches — they fill the sheet width exactly. Two 20-inch-wide pieces plus an 8-inch piece do the same.
First rip, then crosscuts. At the saw, the most efficient sequence is usually to rip the full sheet into strips first, then crosscut each strip into individual pieces. This minimizes how many times you rehandle the heavy sheet.
Leave a trim allowance on final pieces. Build in a small overage (typically 1/4 inch per piece) for face trimming and cleanup cuts. A shelf that must fit exactly 23.25 inches should be cut to 23.5 inches first, then trimmed to final dimension.
Plywood Cut Efficiency by Project Type
The table below shows typical yield and margin to plan for by project type.
How Many Sheets Do You Need?
After planning your layouts, add a margin for cutting errors, bad material sections, and unexpected changes:
For simple cuts (rectangular pieces, no grain matching): add one extra sheet per ten sheets planned. Small projects (under three sheets) should add one sheet regardless.
For grain-matched or figured panels: work through each sheet individually; grain matching often forces less efficient layouts, so extra material is hard to generalize.
For first-time projects: round up more generously. A cabinet project you've never built before will have cuts that need to be redone. Budget for it.
The final number is your sheet count order. If the lumber yard sells a discounted bundle (common in multiples of four or ten), buying the next bundle up often costs less than a return trip.
Quick check for simple projects: if you have a list of rectangular pieces, add up the total square footage of all pieces and divide by 32 (the square footage of one 4×8 sheet). Add your margin. That gives a rough lower bound on sheet count. A detailed layout plan will be more accurate, but the area calculation flags whether your budget is in the right ballpark.
| Project type | Typical pieces per sheet | Main efficiency challenge | Sheets margin to add |
|---|---|---|---|
| Simple shelving unit | 3-5 large panels | Minimal — rectangles fill well | 1 extra sheet |
| Cabinet carcass (box sides, top, bottom, back) | 4-8 pieces per sheet | Fitting back panel (thin, full-width) on same sheet as sides (thick) | 1 extra per 5 sheets |
| Cabinet doors (flat slab or veneered) | 6-12 per sheet | Grain direction; doors must all match | 1 extra sheet minimum; more if grain-matched |
| Drawer boxes | 6-15 per sheet | Small pieces; efficient on offcuts | Use offcuts first; 1 extra sheet for full run |
| Workbench top (laminated plywood) | 2 per sheet (full-width slabs) | Thickness (typically 3/4-inch times 2-3 layers) | 1 extra sheet |
| Toy box or storage bench | 4-8 pieces | Lid piece often needs clean face veneer sheet | 1 extra sheet |
| Speaker cabinet | 8-12 pieces | Double-thickness walls require careful planning of pairs | 2 extra sheets for first build |