Manufacturer chart by actual thickness
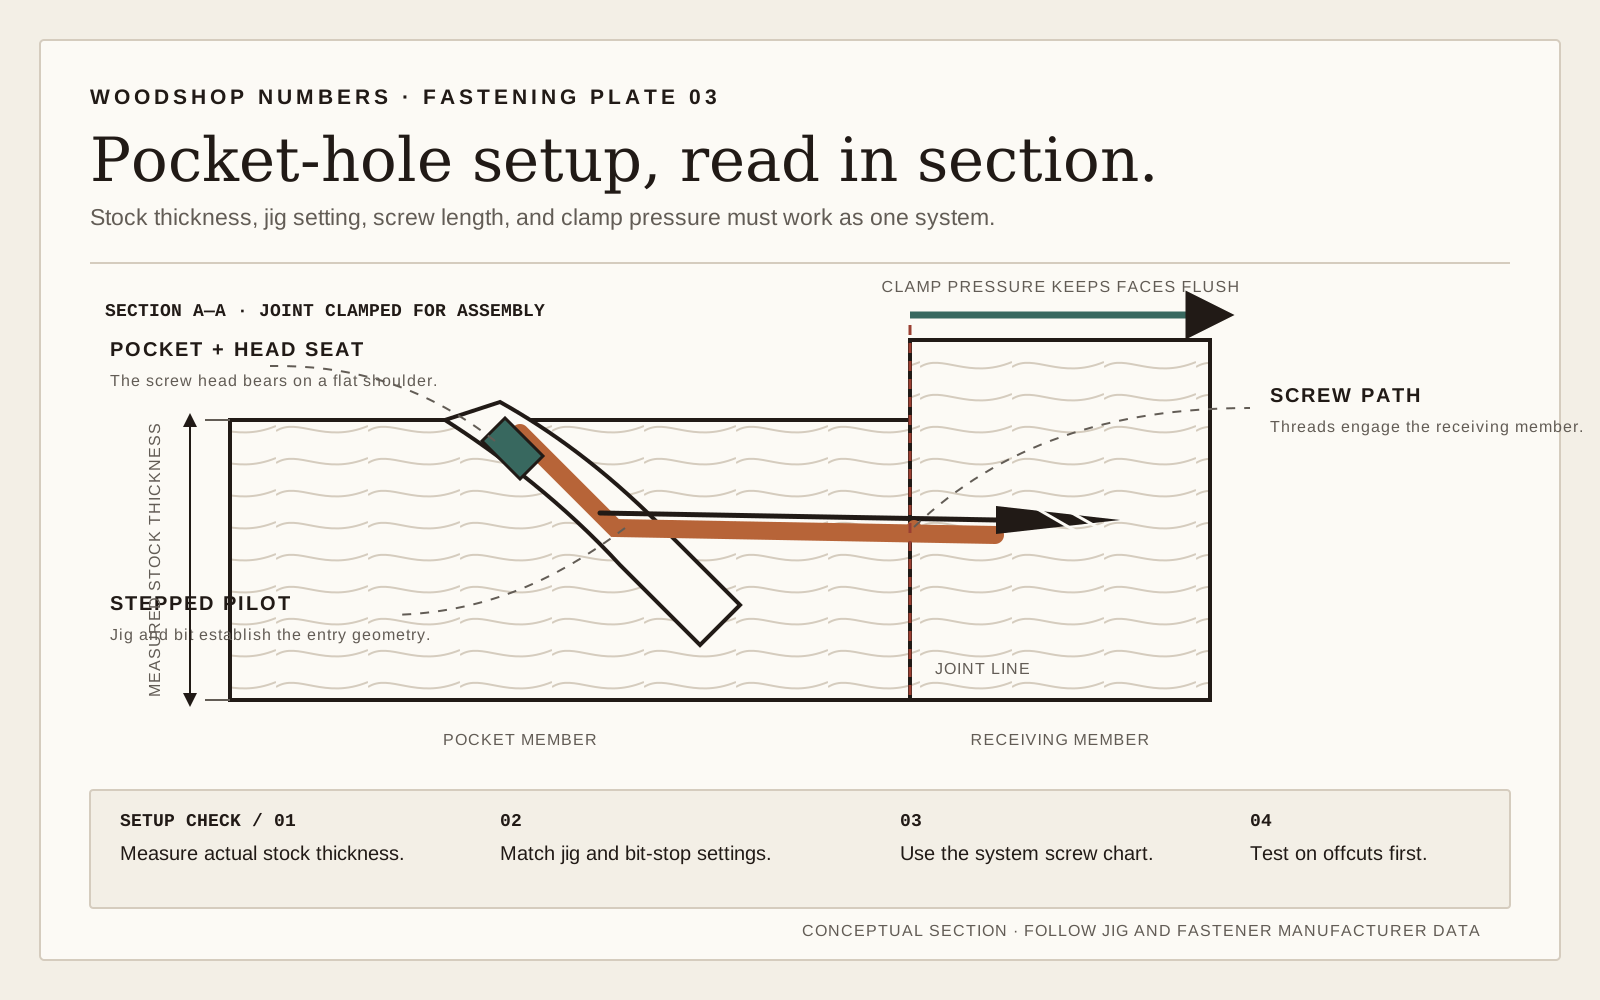
Pocket-hole screw selection begins with the actual thickness of the piece that receives the pocket hole. For current Kreg systems, the manufacturer groups common material into thickness ranges and pairs those ranges with jig, drill-bit, and screw settings. Use the chart below as Kreg-specific guidance and confirm the manual for the exact jig and screw line in your shop.
The screw must travel through the pocketed piece and enter the mating piece far enough to hold without breaking through the face. Too short reduces engagement. Too long can expose the tip, split an edge, or pull the joint out of alignment.
Measure actual material, not the label
A nominal 1x board is commonly thinner than one inch, and plywood sold under a familiar fraction can measure differently. Measure with a reliable rule, caliper, or the gauge supplied with the jig. Check several points and use the thickness where the pocket will actually be drilled.
Kreg's thickness guide groups material from 7/16 through 5/8 inch in its 1/2-inch range, material over 5/8 through 7/8 in the 3/4-inch range, and larger ranges for intermediate and thick stock. These are product-system settings, not new names for the lumber.
Make a test joint whenever material is near a range boundary, when joining plywood with thin face veneer, or when a screw would land near an edge. The test should use the same stock, orientation, and screw.
Choose coarse or fine threads
Kreg recommends coarse-thread pocket screws for softwoods such as pine and for sheet goods including plywood, MDF, and particleboard. The deeper, wider threads gain purchase in softer fibers and composite cores. Fine-thread screws are intended for dense hardwoods such as oak, maple, cherry, birch, ash, walnut, and hickory, where aggressive coarse threads can contribute to splitting.
Species labels are a starting point. Test unusual, brittle, or very dense material. Keep the pocket far enough from the end and clamp the joint securely before driving. A screw should pull the parts together, not be used to correct a misaligned pocket or force a warped board flat.
Choose corrosion resistance from the environment. Indoor dry furniture commonly uses the system's ordinary coated screws, while damp or exterior projects require the manufacturer's appropriate corrosion-resistant option. The coating does not make the wood or joint design weatherproof.
Match the jig, bit, and screw
Material thickness sets three related things: the drill-guide position, the stop-collar depth, and screw length. Changing only the screw while leaving the jig or collar on another thickness setting shifts the pocket and can expose the tip.
Set the jig according to its manual. Set the stepped bit collar with the supplied gauge or scale. Clamp the work firmly so it cannot lift while drilling. Drill until the stop reaches the guide without forcing it. Clear chips from the pocket, especially in resinous wood or repeated holes.
Use true pocket-hole screws with the head and self-tapping tip intended for the system. Ordinary drywall or countersunk wood screws concentrate force differently and can split the pocket shoulder or fail. Drive with the matching bit and a controlled clutch, stopping when the washer-style head seats.
Lay out pocket locations before drilling. Keep them away from end checks, knots, thin plywood voids, routed profiles, and future hardware holes. On a face frame, stagger pockets where several rails meet one stile so screw paths do not collide. Mark the hidden face clearly; a structurally sound pocket in the show face is still a layout failure.
For glued joints, decide whether glue is appropriate for the grain and materials. Pocket screws can act as clamps, but glue does not make end grain behave like a long-grain joint and it can complicate a knock-down assembly. The plan should state whether the screws are permanent fasteners, temporary clamps, or both.
Join different thicknesses safely
When possible, drill the pocket in the thinner piece and attach it to the thicker piece. Set the jig and drill bit from the pocketed piece. For a flush joint, choose screw length from the thinner-material setup and test that the tip stays inside the thicker part.
If the faces are offset, a longer screw may be possible because more receiving material lies in its path, but Kreg advises evaluating the specific orientation. Do not generalize a successful edge joint to a face joint without checking the screw path.
Clamp a stop or use a spacer so repeated assemblies share the same offset. Pocket screws can slide parts as they tighten; a face clamp or right-angle clamp controls that movement. Dry-fit the entire frame before adding glue.
Diagnose exposed tips and weak joints
An exposed tip usually means the screw is too long, the material is thinner than assumed, the jig or collar is on the wrong setting, or the pocket is too close to an edge. Stop production, verify all three settings, and section a scrap joint if the path is unclear.
A screw that spins without tightening may be overdriven, too short, the wrong thread type, or placed in a weak panel core. Do not keep driving. Replace the damaged test piece, lower clutch force, and choose the correct screw. In a finished part, move or repair the hole using a method appropriate to the material.
A joint that steps out of alignment often lacked clamping or reference support. A split hardwood end suggests aggressive threads, a screw too near the end, or excessive torque. The chart gets the starting geometry right; sound layout, clamping, and a test joint complete the system.
| Measured material range | Jig range | Common screw length | Important note |
|---|---|---|---|
| 7/16 to 5/8 in. | 1/2 in. | 1 in. | Kreg notes 3/4-in. screw for some 1/2-in. plywood uses |
| Over 5/8 to 7/8 in. | 3/4 in. | 1 1/4 in. | Measure nominal boards and plywood |
| Over 7/8 to 1 5/16 in. | Intermediate range | Varies by jig: 1 1/2 or 2 in. | Consult the exact jig manual |
| 1 5/16 in. or thicker | 1 1/2 in. | 2 1/2 in. | Test the screw path for the joint orientation |