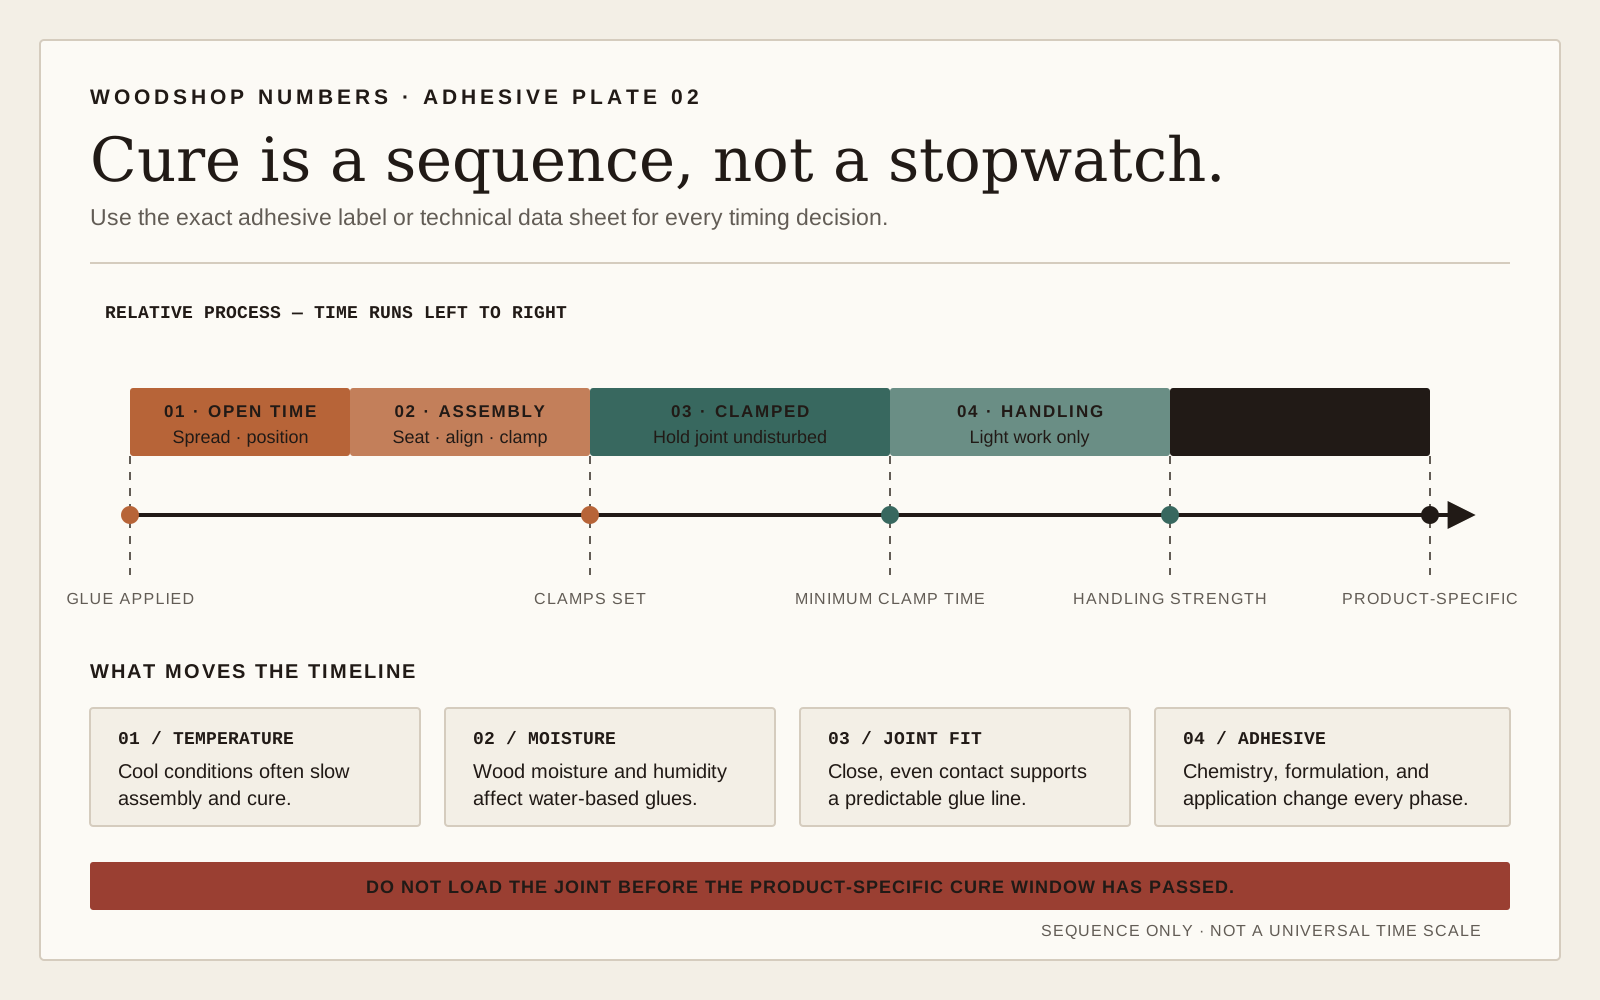
Dry, set, and cured are different
Wood glue does not have one universal "dry time." Open time is the working window before parts must be joined. Assembly time covers positioning and clamping. Clamp time is how long pressure stays on the joint. Handling strength means the assembly can be moved carefully. Full cure is when the adhesive reaches its intended final properties under the stated conditions.
Use the label and technical sheet for the exact glue. Product family, temperature, humidity, wood moisture, joint stress, species, glue spread, and fit all affect the schedule. A clock starts only after surfaces are prepared and the joint is assembled under the conditions the manufacturer specifies.
Manufacturer clamp-time examples
Titebond's FAQ recommends clamping most of its wood glues for thirty minutes to one hour on an unstressed joint, clamping a stressed joint for twenty-four hours, and avoiding stress on a new joint for at least twenty-four hours. Gorilla's Wood Glue page lists twenty to thirty minutes of clamp time at room-temperature application conditions and a twenty-four-hour cure.
Those are sourced examples, not interchangeable rules. A polyurethane glue, liquid hide glue, epoxy, cyanoacrylate, and PVA wood glue cure by different mechanisms. Even products sold by one brand have different open times, temperature limits, and water-resistance classifications.
Read the current bottle because formulations and directions can change. If the label and a general article disagree, use the product instructions. For a safety-critical or high-stress assembly, follow the engineered plan and adhesive documentation rather than a hobby timetable.
What changes the drying schedule
Cold is a major cause of trouble. Water-based glue can form a weak, chalky film when the wood or room is below the product's minimum application temperature. Warming only the air for a few minutes may leave thick boards cold. Condition the glue and lumber within the allowed range before assembly.
High humidity and dense, nonporous, oily, or very wet wood can slow water loss or interfere with bonding. Very dry porous wood may pull moisture quickly and shorten working time. Freshly machined, clean long-grain surfaces usually bond more predictably than burnished, dusty, painted, or finished faces.
Joint fit matters. A starved joint has too little adhesive or excessive pressure that squeezes it out. A gapped joint asks ordinary PVA glue to fill space it is not designed to fill. Excess glue takes longer to lose water and creates cleanup, but more glue does not repair inaccurate joinery.
Clamps also affect stress. A small edge joint that lies flat after unclamping is different from a bent lamination, sprung joint, chair part, or assembly whose own weight tries to open the bond. Keep stressed work supported and clamped according to the longer requirement.
A safe glue-up timeline
Before applying glue, dry-fit the complete assembly. Prepare clamps, cauls, pads, square, cleanup tools, and a stable resting area. Mark reference faces and rehearse the clamping order. That preparation protects the open-time window for alignment rather than searching for equipment.
Machine mating surfaces close to glue-up so they are clean and fit. Spread an even film as directed, assemble within the working time, and apply enough pressure for contact and a small consistent bead of squeeze-out. Check square before the glue grabs.
Record the glue name, room condition, and clamp-on time on painter's tape. Set a timer for the product's minimum clamp period, then consider joint stress before removal. After unclamping, support the assembly on a flat surface and avoid machining, loading, or flexing it until the stated handling or cure period.
For batch work, do not shorten time because the next parts are ready. Add clamps, divide the batch, or change the sequence. Production pressure is not a curing method.
When the assembly must be turned, moved, or stacked after unclamping, support it so its own weight does not lever the new joint. Use spacers that keep air moving without concentrating pressure on one corner.
When to scrape, sand, and machine
Wet cleanup with a damp cloth can push diluted glue into open grain and create a stain-resistant patch. Letting squeeze-out gel and lifting it with a scraper can be cleaner for some PVA glue-ups. Follow the adhesive and finish workflow tested on scrap.
Do not sand rubbery glue. It smears, clogs abrasive, and can contaminate surrounding pores. When the bead is firm enough to scrape cleanly, remove it without gouging the wood. Inspect under raking light and with a small amount of the planned solvent only if that solvent is compatible and safely handled.
Planing or routing puts vibration and leverage into the joint. Wait for the manufacturer's handling and cure guidance, especially for a panel that will be flexed during machining. A joint that survives gentle clamp removal may not be ready for a planer roller or router table.
Diagnose a glue line that stays soft
Check temperature first, including the wood itself. Then check glue age and storage; freezing, contamination, or an unsealed bottle can change a water-based adhesive. Compare the bead outside the joint with glue from the bottle on scrap.
A white or chalky line, weak peel, or separated joint may indicate cold application, poor surface preparation, incompatible material, insufficient pressure, or movement before cure. Do not conceal a failed bond with more fasteners and assume it is fixed. Separate and remake the joint when possible.
If glue remains soft beyond the published window under correct conditions, contact the manufacturer with product code and storage history. The reliable answer comes from the exact formulation, not from extending an internet average.
| Product guidance | Unstressed clamp time | Stressed clamp time | Cure / loading note |
|---|---|---|---|
| Titebond wood glues FAQ | 30 minutes to 1 hour | 24 hours | Do not stress the new joint for at least 24 hours |
| Gorilla Wood Glue | 20 to 30 minutes at stated room conditions | Follow product/joint guidance | Listed cure time: 24 hours |
| Any other adhesive | Do not infer from these examples | Use the exact product directions | Confirm open, clamp, handling, and cure times |