The quick choice
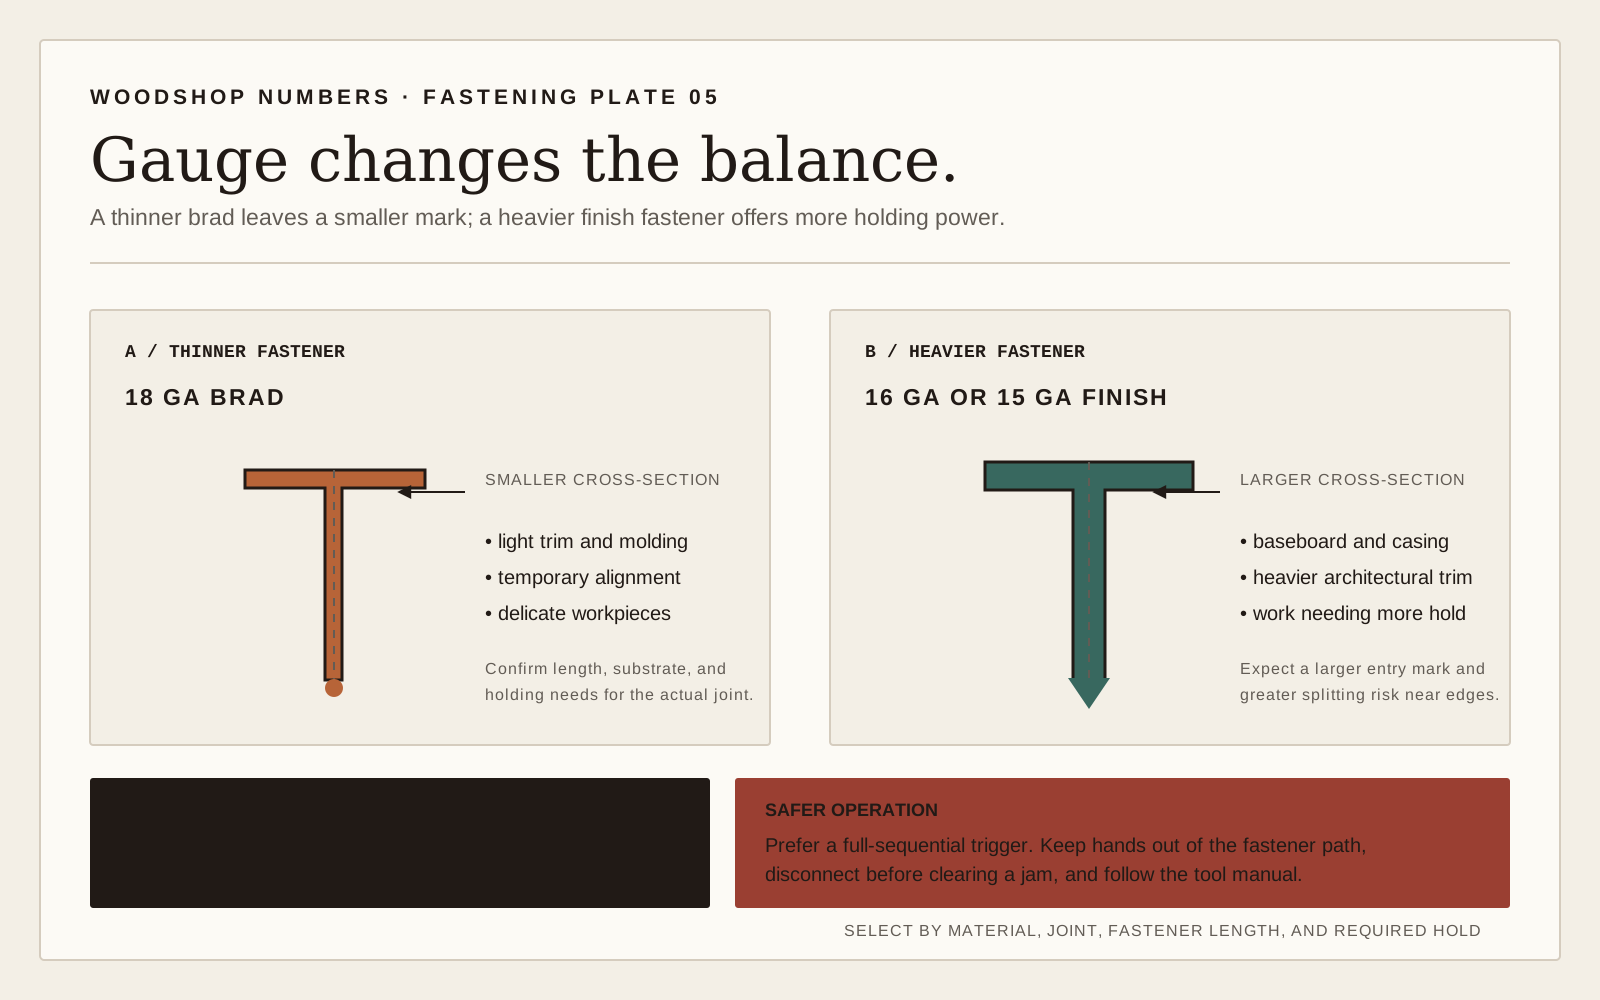
Choose an 18-gauge brad nailer for thin trim, small moldings, light cabinet work, jig assembly, and holding glued parts while the adhesive sets. Choose a 15- or 16-gauge finish nailer when thicker trim or a heavier component needs more holding power and can tolerate a larger entry hole and greater split risk.
For many furniture-focused beginners, the brad nailer is the more useful first tool. WOOD Magazine reaches that conclusion for furniture and cabinet work unless the user also does substantial trim carpentry. A finish nailer becomes the better first purchase when door casing, crown molding, baseboard, or other thicker architectural trim dominates the work.
Fastener size changes the job
Wire gauge runs opposite intuition: a higher gauge number is a thinner nail. Brad nailers commonly drive 18-gauge fasteners with small heads. Finish nailers commonly use thicker 15- or 16-gauge nails with larger heads and more holding power.
The thin brad leaves a smaller hole and is less likely to split delicate molding. It also bends more easily and offers less resistance to a joint pulling apart. The thicker finish nail handles heavier trim but leaves a hole that is more likely to need filling and can damage a narrow or brittle part.
Length matters with gauge. The fastener must pass through the attached piece and enter sound receiving material without emerging from an edge or face. Do not select length from a broad rule alone; test the tool's available fasteners in the exact assembly.
Choose by trim, cabinet, or furniture task
Brad nailers fit small applied moldings, drawer stops, cabinet backs, face-frame details, picture frames, and temporary alignment where glue or joinery provides the lasting bond. They are useful for shop jigs because the small fastener holds a fence while screws are added or a glue line sets.
Finish nailers fit thicker baseboard, door and window casing, crown molding, stair-related trim, and heavier assemblies where a brad would flex or pull through. The stronger fastener can bridge minor wall irregularities, but it still needs suitable backing and is not a substitute for structural fastening.
For a cabinet box, use screws, dados, rabbets, dowels, or another designed joint for the load. A brad can keep a back aligned or stop a part from skating under clamps. For a solid-wood furniture joint, neither nailer turns a weak butt joint into strong joinery.
Nails locate parts; joinery carries structure
Before reaching for a nailer, identify what resists the load after the project leaves the bench. Glue on well-fitted long grain, a mechanical joint, screws, brackets, or structural framing may carry it. The nail may only locate the pieces during assembly.
That distinction prevents overfastening. A row of large finish nails can split a cabinet edge, telegraph through a painted face, or complicate later repair without adding the strength the joint actually needs. A few well-placed brads may be enough to hold alignment until the adhesive cures.
Do not use brads or finish nails where a person, overhead item, railing, structural element, or other safety-critical load depends on an unverified connection. Follow the plan, code, and fastener manufacturer's requirements for those applications.
Pneumatic and cordless tool decisions
Pneumatic nailers are often compact in the hand and can fire repeatedly without carrying a large battery, but they require a compressor, hose, fittings, and noise management. Cordless nailers remove the hose and are convenient around an installed project, but the tool can be heavier and ties the purchase to a battery platform or fuel system.
Choose the power source after choosing the fastener class. Check supported nail lengths, magazine angle, depth adjustment, no-mar tip, dry-fire protection, jam clearing, trigger modes, and service access. A bargain tool that does not accept the length needed for the main project is not a bargain.
For a small shop, consider storage and workflow. A compressor can support other air tools but occupies space and needs maintenance. A cordless tool is easier to deploy for two fasteners but may be tiring overhead. Handle the tool with its battery or hose attached before deciding.
Also price the complete working setup: fasteners in the lengths you need, hose and fittings or batteries and charger, eye and hearing protection, lubricant where specified, and replacement no-mar tips. The tool body alone does not represent the usable system.
Set up, test, and prevent damage
Read the manual and wear eye and hearing protection appropriate to the tool. Disconnect air or power before clearing a jam or opening the nose. Keep hands out of the fastener path; nails can follow grain, bend, and exit the side far from the visible entry point.
Test on a full assembly mock-up. Set depth so the head sits just below the surface without crushing a crater. Confirm that the fastener does not emerge and that the part does not split. Reduce pressure or depth, change length, predrill vulnerable locations when the tool permits, or switch to a smaller fastener.
Place nails where filler and finish can hide them, but avoid future saw cuts, router paths, screws, and hardware. Angle-paired brads can improve temporary resistance, yet they also increase the chance of an unexpected exit. Mark every fastener before later machining.
If the head stays proud, verify pressure, battery, nail compatibility, driver condition, and material hardness before increasing force. If a nail curls out, stop and remove or safely isolate it. If the trim dents, replace the no-mar tip or support the tool better. The right nailer should make assembly cleaner, not merely faster.
| Factor | Brad nailer | Finish nailer |
|---|---|---|
| Common fastener | 18-gauge brad | 15- or 16-gauge finish nail |
| Hole and head | Smaller, easier to hide | Larger, usually needs filler |
| Holding power | Light | Higher |
| Split risk | Lower in thin trim | Higher in narrow or brittle parts |
| Best use | Small molding, cabinets, jigs, glue-up alignment | Thicker trim, casing, crown, heavier finish work |
| Furniture-first beginner | Often the better first tool | Add when heavier trim work requires it |
Primary references
Use the current product label, technical data sheet, safety data sheet and machine manual for the exact item in your shop. These primary references frame the general guidance on this page.
Frequently asked
Can a brad nailer be used for baseboards?
It can handle some light profiles with good backing, but a finish nailer is commonly preferred for thicker baseboard and stronger trim attachment. Match the fastener to the material and wall structure.
Is a brad nailer useful for furniture?
Yes for small molding, cabinet backs, jigs, and holding glued parts in alignment. The furniture's joint or glue line should carry the lasting load.
Which leaves a smaller hole?
An 18-gauge brad leaves a smaller hole than a 15- or 16-gauge finish nail and is less likely to split thin trim.
Can finish nails replace screws?
Not generally. Screws, designed joinery, and structural fasteners serve different loads. Use the connection specified for the project.
Should I buy pneumatic or cordless?
Choose by workflow: pneumatic tools are compact but need a compressor and hose; cordless tools deploy quickly but are heavier and platform-dependent.