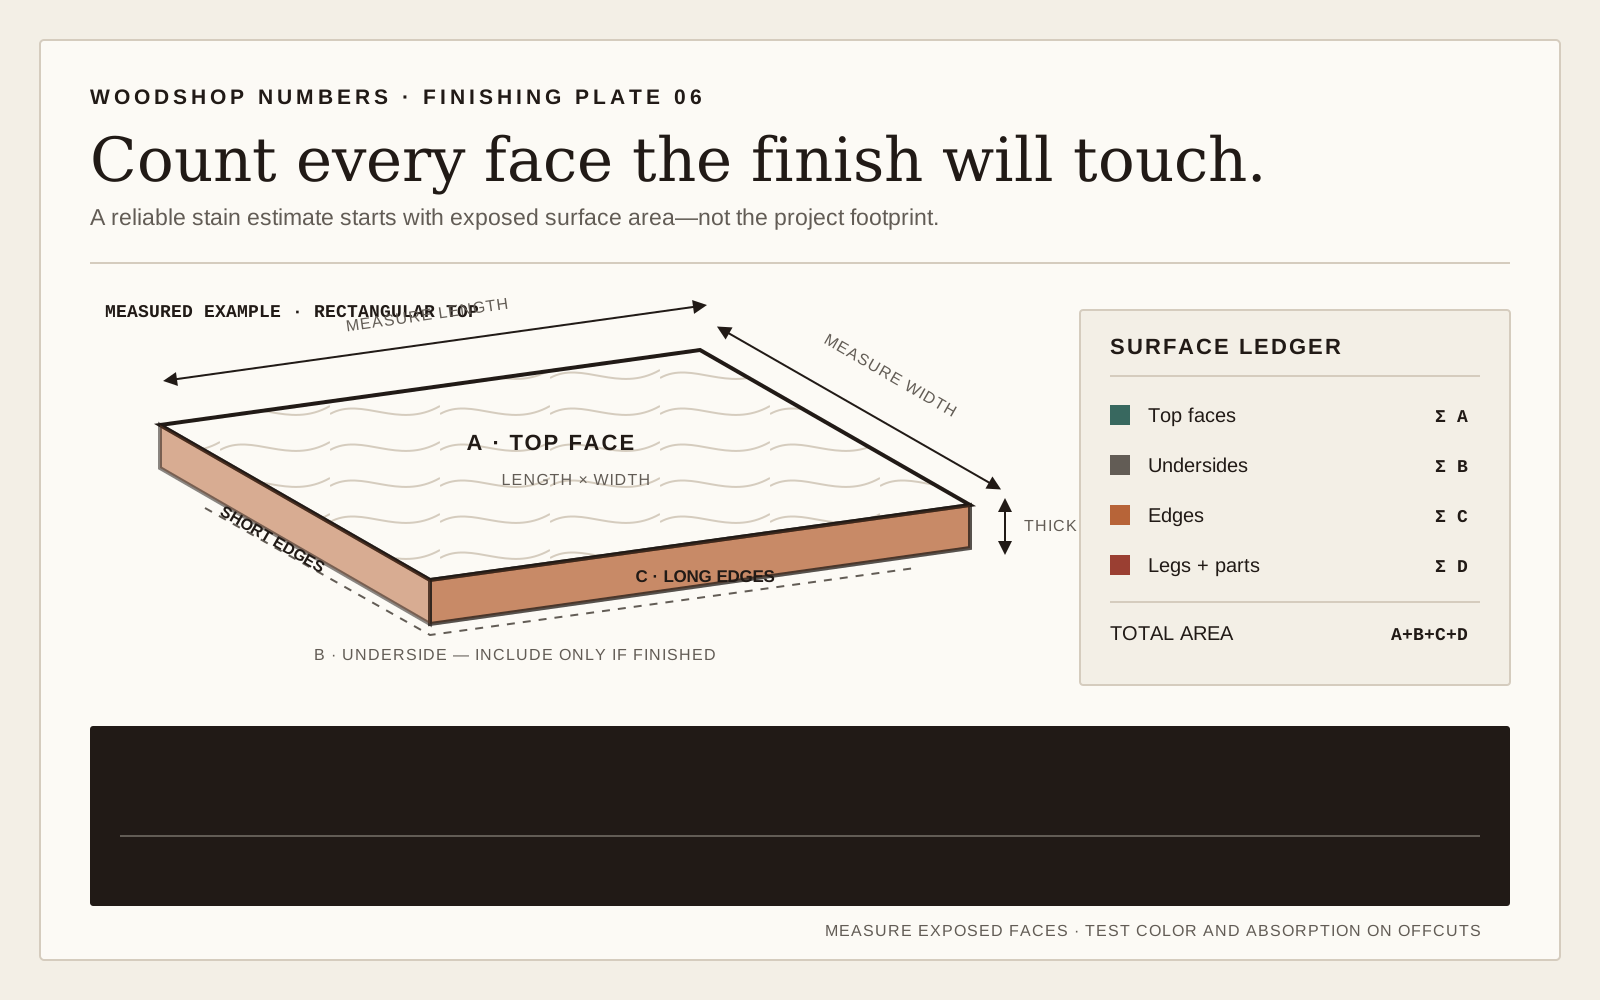
Use the label coverage, then adjust for the project
A wood stain coverage calculator works best when it starts with the product label. Different stains, wood species, application methods, and surfaces can cover differently, so this tool asks for the square footage printed on your can or data sheet. Enter your project area, number of coats, label coverage per container, and a small extra allowance.
The output tells you the total coverage you need and roughly how many containers to buy. It is still an estimate. Stain calculators from manufacturers commonly remind users to treat results as approximate and to check the product label for final guidance.
How to measure stain area
For flat boards, measure length times width for each face you plan to stain. Add all visible faces, edges, shelves, doors, rails, and test pieces. For a tabletop, do not forget the underside if it will be sealed or balanced. For cabinet parts, list panels before assembly so hidden edges and inside faces do not disappear from the estimate.
For decks and fences, break the project into repeated rectangles. Rails, posts, lattice, and pickets take more time and surface area than a single big rectangle suggests. If the shape is irregular, measure sections separately and add them together.
Why coats change the answer
One coat and two coats are different projects. A second coat can deepen color, even out blotchy areas, or meet the finish system's instructions. If you plan to wipe stain back aggressively, test on scrap first; the amount left on the wood may differ from a heavy brushed application.
The calculator multiplies area by coats because each coat covers the same project surface again. If the label gives separate guidance for first and later coats, use the more conservative number or run separate estimates.
Surface condition matters
Freshly sanded wood, rough-sawn boards, end grain, weathered decking, and thirsty softwood can all absorb stain differently. End grain is especially easy to undercount because it drinks finish faster than long grain. Sanding sequence matters too: a surface stopped too coarse may absorb more unevenly, while a surface polished too fine may resist stain.
Use the sandpaper grit chart before staining if you are unsure how far to sand. For furniture, make a sample board from the same species and sanding schedule. For exterior work, clean and dry the surface according to the product instructions before trusting any coverage estimate.
Interior furniture vs decks and fences
Furniture projects often fail because small faces are forgotten: drawer sides, shelf edges, aprons, legs, and underside surfaces. Exterior projects fail because the total area is larger than it looks and because rough, weathered, or vertical surfaces waste more material.
For a dining table, list the top, underside, aprons, legs, leaves, and sample boards. For a fence, list both sides if both sides will be stained, then add posts, gates, and rails. For a deck, separate floor boards, stair treads, risers, railing, and skirting.
Buying and testing workflow
Start with a clean project sketch. Measure the stained surfaces. Read the can label for coverage per container. Run the calculator. Round your purchase to real container sizes and leave room for testing, touch-ups, and future repairs.
Do not open every container at once. Test color first, confirm drying behavior, then proceed in sections. If you are matching existing work, keep the batch information and product name with your project notes so touch-ups later are easier.
| Factor | Effect on estimate | Planning move |
|---|---|---|
| Label coverage | Sets the baseline for the specific product | Use the can or data sheet number, not a generic guess |
| Number of coats | Multiplies the project surface area | Estimate each planned coat before buying |
| Surface texture | Rough or weathered wood can use more stain | Clean, prep, and test before committing |
| End grain and edges | Small areas can absorb heavily | Count edges, legs, rails, and cut ends |
| Application method | Brush, pad, rag, and sprayer workflows waste differently | Follow the product instructions and test on scrap |
| Future touch-ups | Leftover stain can be useful if stored correctly | Buy with the repair plan in mind |